Replacing a crankshaft sensor is an important repair that helps keep your car running smoothly. After installing a new sensor, there are crucial steps to follow. These steps make sure the sensor works right and your car runs well.
The most important things to do after replacing a crankshaft sensor are to check the wiring, reset the car’s computer, and test drive the vehicle. These steps help the new sensor work correctly with your car’s systems. They also make sure there are no other issues that need fixing.
Taking care after the replacement can prevent future problems. It’s a good idea to keep an eye on how your car runs in the days after the repair. This way, you can catch any issues early and fix them fast.
Key Takeaways
- Check sensor wiring and connections after installation
- Reset the car’s computer system to recognize the new sensor
- Test drive the vehicle to ensure proper operation and performance
Preparation
Proper preparation is crucial before starting work on your vehicle’s crankshaft sensor. Taking safety measures and having the right tools on hand will ensure a smooth replacement process.
Safety Precautions
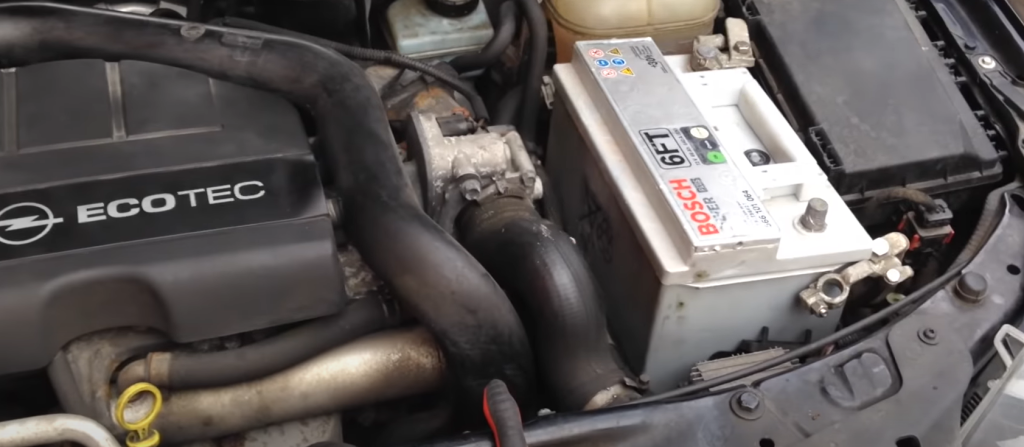
Before beginning any work, make sure the engine is cool to avoid burns. Disconnect the battery to prevent electrical shocks. Work in a well-ventilated area to avoid inhaling fumes.
Wear safety glasses to protect your eyes from debris. Use mechanic’s gloves to guard against cuts and chemicals. Place the vehicle on a level surface and engage the parking brake for stability.
Clear the work area of any flammable materials. Keep a fire extinguisher nearby as a precaution. If lifting the vehicle, use jack stands for added safety.
Required Tools and Materials
Gather these essential items before starting:
- Socket set and ratchet
- Screwdrivers (flathead and Phillips)
- Pliers
- Torque wrench
- New crankshaft sensor
- Wire brush or electrical contact cleaner
- Shop rags
Check your vehicle’s manual for any special tools needed. Some cars may require an OBD-II scanner to reset codes after replacement.
Have a container ready to catch any fluids that might leak. Keep a notepad handy to record the position of parts and wires during removal.
Installation Process
Replacing a crankshaft sensor requires careful steps to ensure proper function. The process involves accessing the sensor, removing the old one, installing the new sensor, and reconnecting electrical components.
Accessing the Crankshaft Sensor

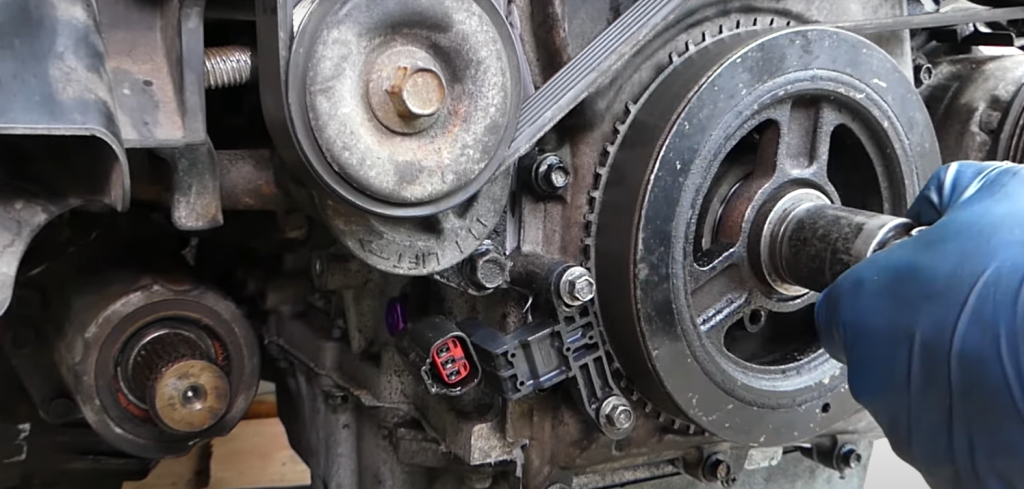
The crankshaft sensor is often in a hard-to-reach spot. It’s usually near the engine’s crankshaft pulley or flywheel.
You might need to lift the car and remove the wheel to get to it. Some cars require taking off engine covers or other parts.
Always check your car’s manual for the exact location. This saves time and prevents damage to other parts.
Removing the Old Sensor
Before removing the old sensor, disconnect the battery to avoid electrical issues. This is a key safety step.
Unplug the electrical connector from the sensor. It might have a clip or tab to release it.
Look for bolts holding the sensor in place. There’s often one or two. Remove these carefully.
Gently pull out the old sensor. It might be stuck due to dirt or rust. If so, use a penetrating oil to help loosen it.
Installing the New Sensor
Clean the sensor mounting area before installing the new one. This ensures a good fit and accurate readings.
Check that the new sensor matches the old one in size and shape. Put it in place and secure it with the bolts you removed earlier.
Don’t overtighten the bolts. This can damage the new sensor or its wiring.
Apply a thin layer of dielectric grease to the sensor’s electrical connections. This prevents moisture and corrosion.
Reconnecting Electrical Connectors
Carefully plug the electrical connector back into the new sensor. Make sure it clicks or locks into place.
Check the wiring for any damage or fraying. Replace any worn-out wires or connectors.
Reconnect the car’s battery. This is the last step before testing the new sensor.
Use zip ties to secure any loose wires away from hot or moving engine parts.
Post-Installation Checks
After replacing a crankshaft sensor, it’s crucial to perform thorough checks. These ensure proper installation and function of the new sensor.
Sensor Alignment
Correct alignment is key for accurate readings. Check that the sensor is securely mounted in its designated spot. The gap between the sensor and the reluctor wheel should match the manufacturer’s specs. This gap is usually very small, often less than 1 mm.
Use a feeler gauge to measure the gap. If it’s too wide or narrow, adjust the sensor’s position. Some sensors have adjustable brackets to help with this.
Make sure the sensor faces the right direction. Its tip should point directly at the reluctor wheel teeth. A misaligned sensor can cause erratic engine behavior.
Electrical Test
Test the crankshaft sensor and wiring with a multimeter. This verifies proper electrical connections.
Check the sensor’s resistance. Compare your readings to the specs in the vehicle’s manual. Typical values range from 200 to 2000 ohms.
Test for continuity in the wiring harness. Look for any shorts to ground. Inspect the connector pins for corrosion or damage.
Verify the sensor is getting the correct voltage. Most crankshaft sensors need 5 or 12 volts to work properly.
Troubleshooting Common Issues
If problems persist after installation, check these areas:
- Faulty wiring: Look for frayed or damaged wires.
- Loose connections: Ensure all plugs are fully seated.
- Incorrect sensor: Verify you have the right part for your vehicle model.
Clear any error codes stored in the engine control module. Use a scan tool to do this.
Start the engine and listen for unusual noises. Watch for any warning lights on the dash. If the check engine light stays on, recheck your work or seek professional help.
Test drive the vehicle. Pay attention to any hesitation, stalling, or rough idling. These could indicate lingering sensor issues.
Engine Operational Test
Testing the engine after replacing the crankshaft sensor is crucial. It helps confirm proper installation and ensures the sensor is working correctly.
Starting the Engine
Turn the key in the ignition to start the engine. Listen for any unusual noises or vibrations. A smooth start indicates successful sensor replacement.
If the engine doesn’t start, double-check all connections. Make sure the sensor is compatible with your vehicle model.
Try starting the engine a few times. This allows the new sensor to sync with the car’s computer system.
Monitoring Performance
Let the engine run for several minutes. Watch for any warning lights on the dashboard, especially the check engine light.
Pay attention to how the engine idles. A steady idle suggests the new sensor is functioning well.
Take the car for a short drive. Test acceleration and deceleration. The engine should respond smoothly without hesitation or misfires.
Monitor fuel consumption over the next few days. Improved fuel efficiency often results from a properly working crankshaft sensor.
If any issues persist, consider using a diagnostic tool to check for error codes. This can help identify any remaining problems.
Maintenance Tips
Proper care and regular checks are key to keeping your crankshaft sensor in good shape. These steps help prevent issues and extend the sensor’s life.
Sensor Care
Clean the sensor and its surrounding area regularly. Use a soft brush or cloth to remove dirt and debris. Avoid harsh chemicals that could damage the sensor.
Check the sensor’s wiring for any signs of wear or damage. Replace frayed or corroded wires promptly.
Keep the sensor dry. If it gets wet, dry it thoroughly before starting the engine.
Apply a thin layer of dielectric grease to the sensor’s connections. This helps prevent corrosion and ensures a good electrical connection.
Regular Check-Ups
Test the crankshaft sensor every 30,000 miles or as recommended by your car’s manual. Use a multimeter to check its resistance and compare it to the manufacturer’s specs.
Look for signs of sensor failure, such as engine misfires or stalling. Address these issues promptly to prevent further damage.
Check the sensor’s mounting bolts periodically. Tighten them if loose to prevent vibration damage.
Scan for error codes using an OBD-II scanner during routine maintenance. This can catch sensor issues early.
Have a professional inspect the sensor during regular tune-ups. They can spot potential problems you might miss.
Frequently Asked Questions
Replacing a crankshaft sensor can lead to some unexpected issues. Here are answers to common questions about troubleshooting problems and ensuring proper function after installation.
Why won’t my car start after replacing the crankshaft sensor?

If your car won’t start after replacing the crankshaft sensor, check the electrical connections. Make sure the sensor is plugged in correctly and securely. Also, verify that the sensor is installed in the right position and orientation.
Sometimes, a faulty new sensor can cause starting issues. Try using a multimeter to test the sensor’s resistance and output.
Does a new crankshaft sensor need to be programmed?
Most crankshaft sensors do not require programming after installation. They are typically plug-and-play devices. However, some newer car models may need the sensor to be calibrated using a diagnostic tool.
It’s best to consult the vehicle’s manual or a professional mechanic to determine if programming is necessary for your specific make and model.
How can I reset the crankshaft position sensor without a scanner?
Resetting the crankshaft position sensor without a scanner involves a simple process. First, disconnect the car battery for about 15 minutes. This allows the car’s computer to reset.
After reconnecting the battery, start the engine and let it idle for a few minutes. Then, take the car for a short drive to allow the computer to relearn the sensor’s signals.
What are common problems after replacing a crankshaft position sensor?
Common issues after sensor replacement include engine misfires, stalling, and poor performance. These problems often stem from incorrect installation or a faulty new sensor.
Other issues may include check engine lights remaining on or new error codes appearing. In some cases, the car may have difficulty starting or experience rough idling.
How long does it take for a crankshaft sensor to reset after installation?
The crankshaft sensor usually resets quickly after installation. In most cases, it takes about 10-15 minutes of engine runtime for the car’s computer to recognize and adjust to the new sensor.
For some vehicles, it may take a few short drives before the sensor fully calibrates. This process allows the computer to gather data and optimize performance.
What should I check if my car still dies after I’ve replaced the crankshaft position sensor?
If your car continues to die after sensor replacement, inspect the wiring and connections. Look for any loose, damaged, or corroded wires.
Check the battery and alternator as well. These components can cause similar symptoms if faulty. It’s also worth scanning for error codes to identify any other potential issues.
When you purchase a product through Amazon links on carsolutionpro.com, we may earn a small commission at no extra cost to you. This helps support the site and keep our content free. As an Amazon Associate, we earn from qualifying purchases made through our links.


