Car heating and cooling issues can be frustrating. Many problems stem from a faulty blend door actuator, which controls airflow in your vehicle’s HVAC system. To fix this, you can calibrate the blend door actuator yourself in just a few steps. This process resets the actuator’s position, often solving temperature control problems.
Calibrating a blend door actuator is simpler than it sounds. With some basic tools and knowledge, most car owners can do this at home. The process involves locating the actuator, removing it, testing it, and then reinstalling it correctly. By following these steps, drivers can improve their car’s climate control and avoid costly mechanic visits.
Key Takeaways
- Blend door actuator calibration can fix many car heating and cooling issues
- The calibration process involves removing, testing, and reinstalling the actuator
- Proper calibration improves HVAC performance and can be done at home with basic tools
Understanding Blend Door Actuators
Blend door actuators play a key role in a vehicle’s climate control system. These small motors control airflow and temperature inside the car, ensuring passenger comfort.
Function of a Blend Door Actuator

A blend door actuator is a crucial part of a car’s HVAC system. It controls the position of flaps or doors that direct air through the heating and cooling components. This allows the system to adjust temperature and airflow.
When you set the temperature in your car, the actuator moves the blend door. This door mixes hot and cold air to reach the desired temperature. The actuator also controls which vents the air comes out of – face, feet, or defrost.
Blend door actuators work with other parts like the thermostat and control panel. Together, they maintain the right temperature and airflow in the vehicle.
Symptoms of a Miscalibrated Actuator
When a blend door actuator is not calibrated correctly, it can cause several issues:
- Inconsistent temperatures
- Air blowing from wrong vents
- Clicking or ticking noises from the dashboard
- Inability to change temperature settings
Incorrect airflow is a common sign of a miscalibrated actuator. The air might come out of unexpected vents or not change when you adjust the settings.
Temperature control problems are another indicator. The air may stay too hot or too cold, regardless of the setting. In some cases, one side of the car might be a different temperature than the other.
Strange noises often point to actuator issues. A clicking sound when changing settings can mean the actuator is trying to move but can’t reach the right position.
Preparing for Calibration
Before starting the calibration process, gather the necessary tools and take safety measures. Proper preparation ensures a smooth and safe calibration of your blend door actuator.
Tools and Materials Needed
To calibrate a blend door actuator, you’ll need a few basic tools:
- Screwdriver set (flathead and Phillips)
- Pliers
- Voltmeter or multimeter
- Repair manual for your specific vehicle
Some cars may require a scan tool for calibration. Check your vehicle’s manual to see if this applies to your model.
Keep a clean cloth and rubbing alcohol handy to clean connectors if needed.
Safety Precautions
Safety should be your top priority when working on your car’s electrical system.
Always disconnect the car battery before starting work. This prevents electrical shocks and accidental short circuits.

Wear safety glasses to protect your eyes from debris.
Work in a well-ventilated area to avoid inhaling fumes.
If you’re not comfortable with car repairs, it’s best to consult a professional mechanic. They have the expertise to handle complex calibrations safely.
Park your car on a level surface and engage the parking brake before starting work.
Accessing the Blend Door Actuator
Reaching the blend door actuator requires locating it and clearing the path. This process involves identifying the correct component and removing any obstacles in the way.
Identifying Actuator Location
The blend door actuator is usually found behind the dashboard. Its exact position varies by vehicle make and model. Check the car’s manual for the specific location.
In most cases, the actuator is near the center console or glove box. Look for a small motor with wires attached. It may be partially hidden by other components.
Some common spots include:
- Behind the glove box
- Under the dash near the center console
- Near the firewall on the passenger side
If you can’t find it, consult your vehicle’s manual for guidance. The manual often has diagrams showing the actuator’s exact position.
Removing Obstructions
Once you’ve found the actuator, you’ll need to clear a path to it. This may involve removing parts of the dashboard or interior trim.
Start by disconnecting the car battery for safety. Then, remove any panels or components blocking access. Common parts to remove include:
- Lower dash panel
- Glove box
- Center console
Use the proper tools to avoid damaging trim pieces. Plastic trim removal tools are helpful for prying off panels without scratching.
Keep track of all screws and clips you remove. Store them in labeled bags to make reassembly easier.
Be gentle when moving wires or connectors out of the way. Avoid yanking on electrical components. If something doesn’t budge easily, double-check for hidden fasteners before forcing it.
Calibration Process
Calibrating a blend door actuator is crucial for proper temperature control in a vehicle’s HVAC system. The process can be done manually or electronically, depending on the vehicle model and manufacturer specifications.
Manual Calibration Steps
To manually calibrate a blend door actuator, start by checking the car’s manual for specific instructions. If no instructions are provided, follow these general steps:
- Locate the blend door actuator behind the dashboard.
- Disconnect the battery for 30 seconds to reset the system.
- Reconnect the battery and turn on the ignition.
- Set the temperature control to its highest setting.
- Wait for 30 seconds, then set it to the lowest setting.
- Repeat this process 3-4 times to ensure proper calibration.
Test the system by adjusting the temperature and feeling the air from the vents. If issues persist, a professional diagnosis may be necessary.
Electronic Calibration Procedure
Many modern vehicles require an electronic calibration procedure. This method is often more precise and may involve:
- Connecting a diagnostic tool to the vehicle’s OBD-II port.
- Accessing the HVAC system in the diagnostic software.
- Initiating the calibration mode through the software.
- Following on-screen prompts to complete the process.
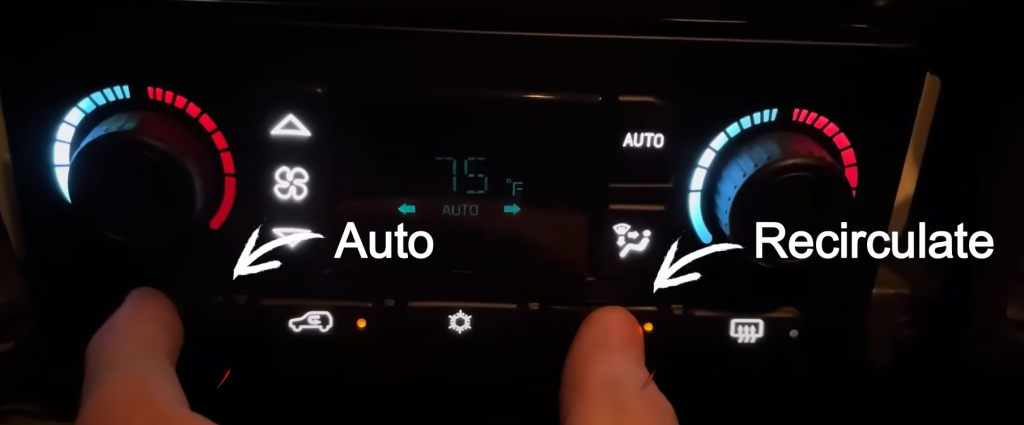
Some vehicles have a built-in calibration mode. To access it:
- Turn the ignition to the “On” position without starting the engine.
- Press a specific combination of climate control buttons.
- Wait for the LED lights to stop flashing, indicating completion.
If calibration fails, double-check the procedure and consider seeking professional help.
Testing and Verification
After calibrating the blend door actuator, it’s crucial to test its operation and confirm successful calibration. This ensures proper climate control functionality and helps avoid future issues.
Testing Actuator Operation
To test the blend door actuator, start the vehicle and turn on the climate control system. Set the temperature to the coldest setting and feel the air coming from the vents. It should be cool. Then, adjust the temperature to the warmest setting and check if hot air comes out.
Listen for any unusual noises during temperature changes. A properly functioning actuator should move smoothly without grinding or clicking sounds.
Use a diagnostic tool to check for error codes related to the blend door actuator. Clear any existing codes and rerun the test to ensure no new codes appear.
Confirming Successful Calibration
To confirm successful calibration, run the vehicle through its full range of temperature settings. The air temperature should change smoothly and consistently as you adjust the controls.
Check that the actual air temperature matches the selected temperature on the climate control panel. Use a thermometer to measure the air coming from the vents at different settings.
Test the system in various modes, such as defrost, floor, and bi-level. The airflow should direct correctly to the appropriate vents in each mode.
If all tests pass without issues, the blend door actuator calibration was likely successful. If problems persist, recalibration or replacement of the actuator may be necessary.
Frequently Asked Questions
Calibrating a blend door actuator involves specific steps that vary by vehicle make and model. The process typically requires accessing the actuator, resetting it, and following manufacturer instructions.
What steps are involved in calibrating a blend door actuator for a Chevrolet Silverado?
For a Chevrolet Silverado, locate the blend door actuator behind the dashboard. Disconnect the battery and remove the actuator. Reset it by turning it fully clockwise and counterclockwise.
Reconnect the actuator and battery. Start the engine and set the temperature to the lowest setting, then the highest. This process helps recalibrate the actuator.
Can you explain the process of calibrating an HVAC blend door actuator?
Calibrating an HVAC blend door actuator starts with identifying the correct actuator. Turn off the vehicle and disconnect the battery.
Remove the actuator and manually rotate it to its full range of motion. Reinstall the actuator and reconnect the battery. Use the HVAC controls to cycle through all temperature settings.
How do I perform a blend door actuator calibration on a Nissan vehicle?
For Nissan vehicles, access the actuator through the glove box or under the dashboard. Disconnect the battery and remove the actuator.
Manually rotate the actuator gear to its limits. Reinstall the actuator and reconnect the battery. Turn on the engine and cycle through all temperature settings on the HVAC control panel.
What is the method to reset a Dodge Charger’s blend door actuator?
To reset a Dodge Charger’s blend door actuator, locate it behind the dashboard. Disconnect the battery and remove the actuator.
Manually rotate the actuator to its full range. Reinstall and reconnect the battery. Start the engine and cycle through all temperature settings on the HVAC panel.
Does a GM vehicle’s blend door actuator require calibration, and if so, how is it done?
GM vehicles often require blend door actuator calibration. Locate the actuator behind the dashboard or glove box.
Disconnect the battery and remove the actuator. Reset it manually by rotating to its limits. Reinstall and reconnect the battery. Start the vehicle and cycle through all HVAC temperature settings.
Is it necessary to disconnect the battery to reset a blend door actuator?
Disconnecting the battery is often recommended when resetting a blend door actuator. This step helps prevent electrical issues and ensures a complete reset of the system.
After disconnecting, wait a few minutes before proceeding with the calibration process. This pause allows the vehicle’s computer to fully reset.
When you purchase a product through Amazon links on carsolutionpro.com, we may earn a small commission at no extra cost to you. This helps support the site and keep our content free. As an Amazon Associate, we earn from qualifying purchases made through our links.


